|
Image
Mapping from PowerPoint to the web
Logic: add interactivity in PowerPoint for the web
We had a question on the PowerPoint newsgroup about image mapping.
The following is an example of how image mapping can be done
and exported to the web.
Now, before you start, you need to check out TAJ's good tutorial on
hyperlinking, and Sonia Coleman's tutorial on Screen Tips:
Hyperlinking, TAJ Style
Screen Tips, Sonia Style
Why? Well, I'm not going to redo all of their good work. They've
gone into these issues at a much better level than you will find here.
OK...
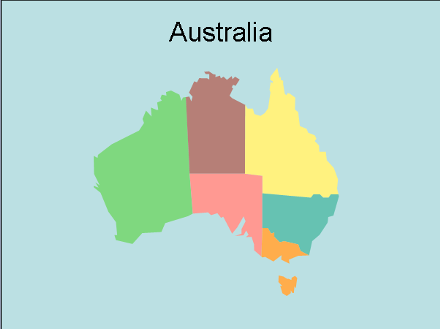
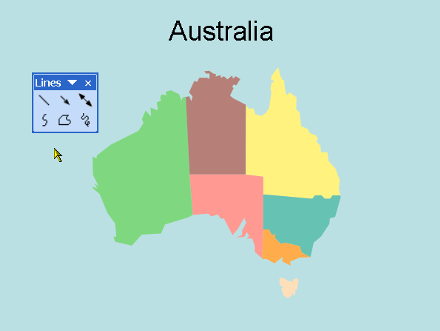
I
started with a map of Australia, which is broken already into
states. It was actually a Clip Art that I busted. Remember? Turn it
into a Microsoft Picture by ungrouping?
Note, if you
had a real picture that couldn't be split, you could instead draw
autoshapes over the top of these states and still get the desired
effect. Now that is real image mapping, which I have covered
towards the end of this section.
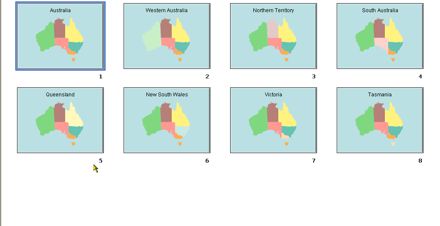
So you know where we are going:
1. We will hyperlink each state to a slide that has that particular
state on it, with the state faded for effect.
2. We will also hyperlink a box on the slide master to the first
slide (Australia).
3. We will add Screen Tips that will pop up on viewing.
1. But before you begin, you need a slide with each state on it.
Each slide must be labeled with the state you want to highlight,
and give it a title.
We now go back to the first slide and add a hyperlink. Right click
on the first state and hyperlink it to the particular slide.
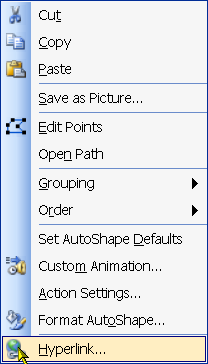
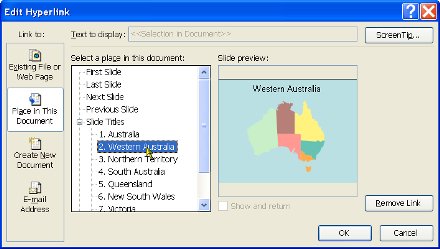
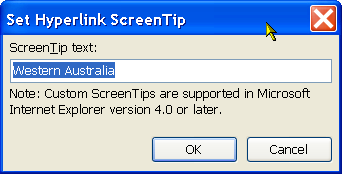
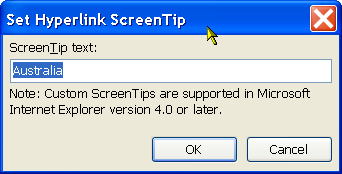
We now need to add the "Screen Tip" while we are here. The Screen
Tip will pop up, telling us information about the particular state
we are looking at in slide show view. Please note, I learnt this one from Sonia
Coleman. Click on Screen Tip in the top, right hand corner, and type
in the Screen Tip representing the state.
We do this on the first slide for all states until all are done. We
will have to do this for all slides! You decide the easiest way to
do this! Now, when this is run as a show, if we click on any state,
it will go to that state, and a pop up Screen Tip will tell us the
name. But we also need a way to go back to the index slide at the
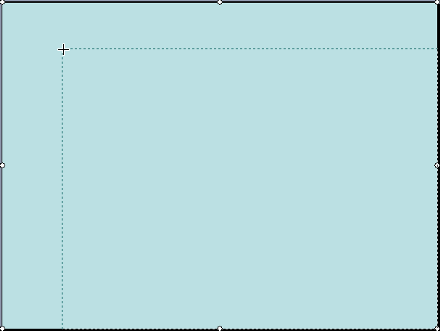
start. I did this by adding a full screen rectangle on the Master
Slide, hyperlinked to slide one. Because it will appear behind
objects that are not on the Master, it will not interfere with those
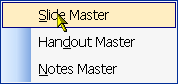
hyperlinked states. We go View | Master | Slide Master, and draw our
rectangle.
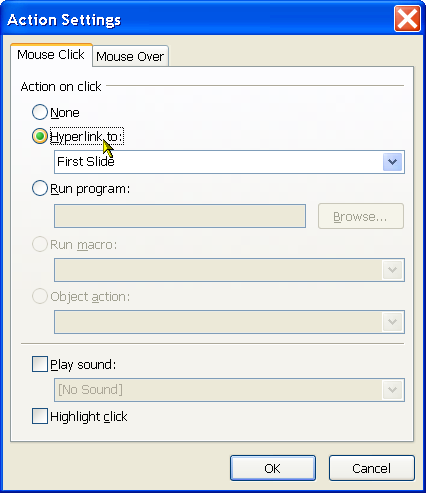
We hyperlink it to the first slide and add the appropriate Screen
Tip. (The following is a different way to hyperlink). While it
works, don't bother, because you still have to edit the hyperlink to
get the Screen Tip.
Now we can run the show and it should all work. Click on any sector,
and it will go to that state. Click outside the states, and it will
go to the first slide.
Now, here is your chance to download an example, before we get to
real image mapping.
To download the example PowerPoint file, please right click to save
<click here>.
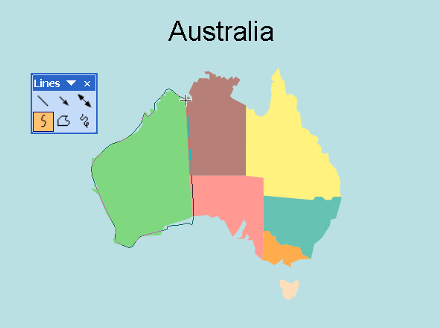
Mapping real images.
Now, I don't have a real image of Australia that I can map, so I'll
use the same one, and pretend it can't be split into states. So,
we'll assume it can't be busted because it is a picture. The process
is quite simple. Instead of hyperlinking to the state sectors, we
draw a curved line over the top. Then we hyperlink to that.
Then we hyperlink / Screen Tip that as an overlay. Last, we
get rid of the fill and border line of the shape to make it
invisible. We can then save as a web
page, and it should all function fine.
Now remember, when you draw your autoshape, it does not have
to be perfect. No-one will see it when they click on it, so they
won't know if it is not pixel perfect. However, you need to do a
fairly good job between shapes (or states, in this example).
No-one will want to click on a state and get the wrong one pop up.
|
