|
Wrapping Images in PowerPoint
Why?
Use PowerPoint's drawing tools and Grid to customize an
autoshape with an image background.
The tutorial for version
2003 is here
This will be a brief explanation, sticking to how to build the technique in
PowerPoint 2007. This, by the way, was done for
PowerPoint
Live, in October 2003, so you can get an idea of what you
are in for at this magical event! But don't fret if you missed it,
it is on again this year!
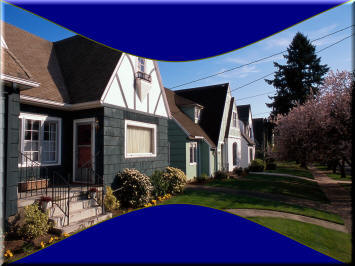
This is an image as the background to a custom drawn autoshape. So,
how was it done?
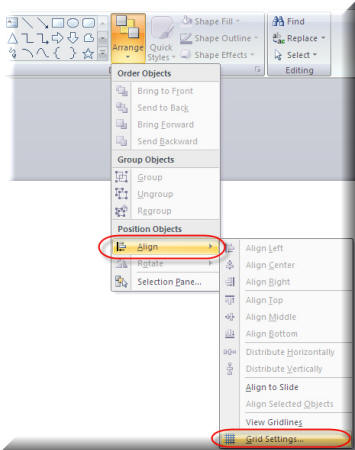
First, you need to display your drawing guides.
-
Go to the Drawing group on the Home tab
of the Ribbon.
-
Click the Arrange button| Align| Grid
Settings.
-
Click the Display drawing guides on
screen checkbox.
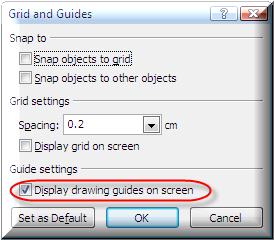
You will end up with a couple of Guides that probably meet in the middle. If you
click on one, and provided there is no actual object or image there to get in
your way, you can drag them. Holding the <Control> key while you drag will
produce a duplicate one.
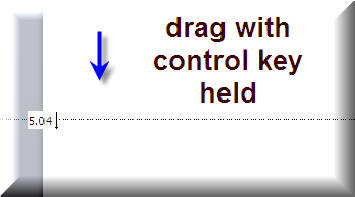
This
works for both horizontal and vertical ones. In our case, we want
three horizontal and three vertical.
You need them
"roughly" where mine are. Now to the autoshape...
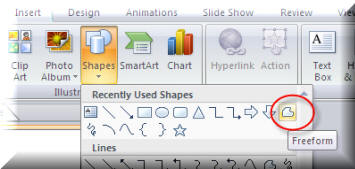
Go to the Insert tab of the Ribbon| Shapes
button| and the Freeform line.
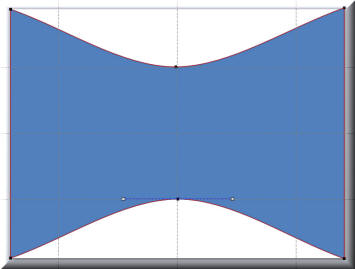
-
Start in the top left hand corner,
clicking once everywhere I have a number.
-
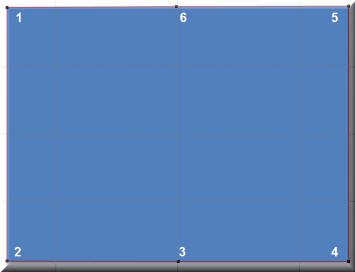
You will end up with 6 points.
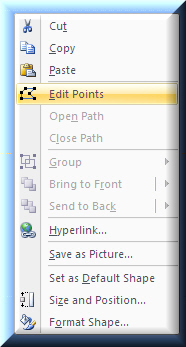
Right click on the shape and select Edit
Points.
What we will now do is turn two of our drawn points into
"Corner Points".
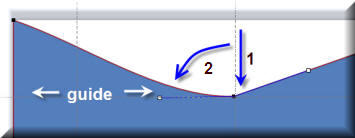
-
Drag the center point down (# 6) to the
apex of the previously set, top guide.
-
Drag the end of the handle at the left
side down to the apex of the guides, as shown n the
second arrow above.
-
Do the same for the point to the right.
-
Then drag the bottom point up and do the
same for both handles.
Doing that top and bottom, but only for the middle points 3 and 6
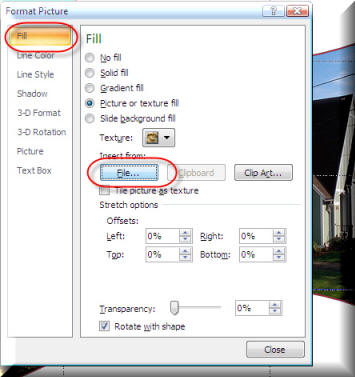
will produce the base for our wrap around image. Now to add a picture fill, and get rid of the outside line.
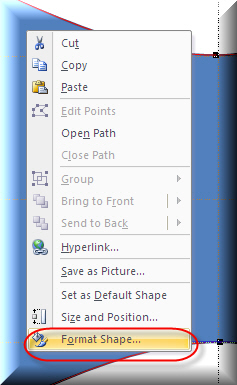
-
Select the Fill tab
-
Click the File button and select your
image
-
This is a "modeless" dialog box. Your
effect will be applied instantly.
Our final result!
© Glen Millar
Last Updated:
April 02, 2005
|
