|
Wrapping Images in PowerPoint
Logic: use PowerPoint's drawing tools and Grid to customize an autoshape with an image background
Well, here is where we are heading! This, by the way, was done for
PowerPoint
Live, in October, so you can get an idea of what you
are in for at this magical event! But don't fret if you missed it,
it is on again this year!

This is an image as the background to a custom drawn autoshape. So,
how was it done?
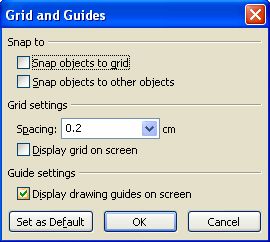
First, you need to display your drawing guides. I access them by the
keyboard combination of <Control + G>. Or you can go View | Grids
and Guides. Select "Display drawing guides on screen".

You will end up with a couple of Guides that probably meet in the
middle. If you click on one, and provided there is no actual object
or image there to get in your way, you can drag them. Holding the
<Control> key while you drag will produce a duplicate one. This
works for both horizontal and vertical ones. In our case, we want
three horizontal and three vertical. Now, I am not going to worry
about the actual numbers of where they are. That's because mine are
set in centimeters, and yours may be inches. But you need them
"roughly" where mine are.
OK...
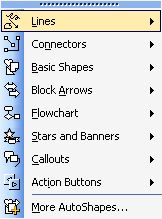
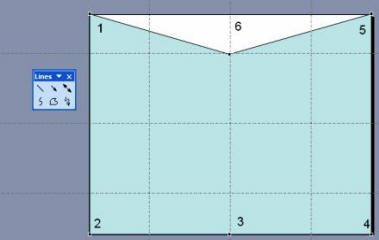
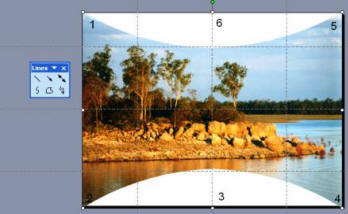
On the Drawing toolbar, we select, Autoshapes | Lines, and the
"Freeform" button.
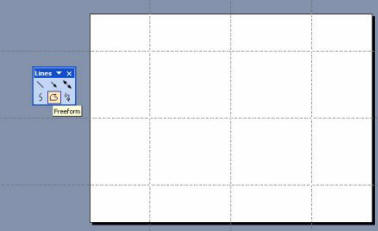
Then we start drawing our shape.
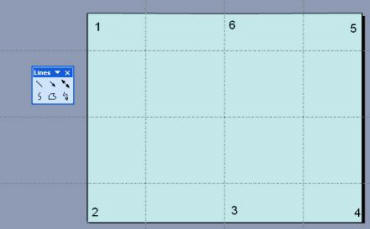
Now, we start in the top left hand corner, clicking once everywhere
I have a number. You of course realize we are starting at number 1
<g>?
Anyway we will end up with six actual dots. The last one (back at
number six) is where we double click to finish the shape. This is
covered, by the way, in areas of this site.

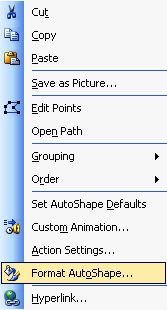
We then right click on the newly drawn shape, and select "Edit
Points". What we will now do is turn two of our drawn points into
"Corner Points".
We first select the top, middle point (# 6) and drag it down to the
apex of our previously set, top guide. We do the same for point # 3.
Then we right click on the actual point (# 6) , and find we get a
different menu.
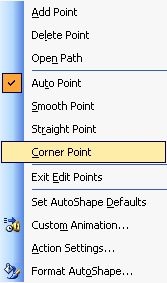
We select "Corner Point". Notice two little handles that suddenly
appear.
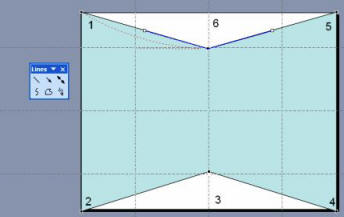
We need to drag the end of the handle at the left side down to the
apex of the guides, as shown in the next image. You can tell by now
that we deliberately set those Guides where they are to use their
intersections as locations where we could accurately drag drawing
handles to!

If we do that for both sides, we will get a nice rounded shape.
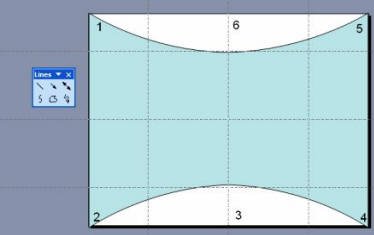
Doing that top and bottom, but only for the middle points 3 and 6
will produce the base for our wrap around image.
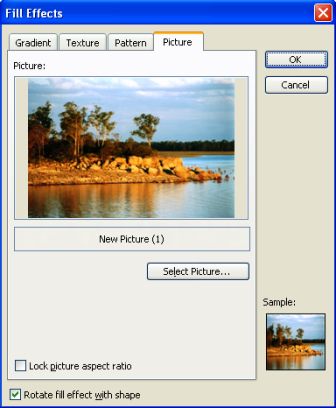
We then add a picture fill, and get rid of the outside line.
Time now to turn off the guides, again by <Control + G>. Now
remember, this is just a FRACTION of what you might have learnt if
you had attended PowerPoint Live last year. But don't fret, it is on
again!
© Glen Millar
Last Updated:
April 02, 2005
|
