|
Clever Snap to Grid
Logic: use native PowerPoint features to position objects in
PowerPoint
The Snap to Grid option in PowerPoint can be a bit confusing. Not so
much in how it works, but what is it for? That is really for?
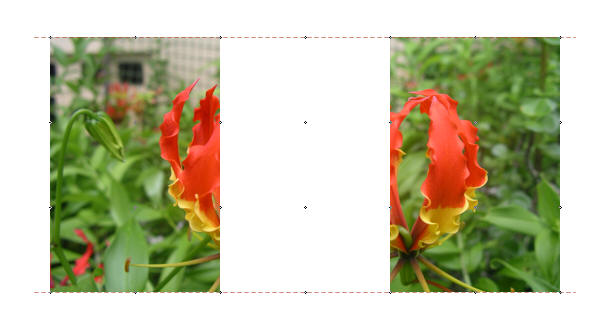
Well, here is an example of cropping images.
I want to overlay one
identical image on top of another. Then split them both in half, but
have the join match perfectly.
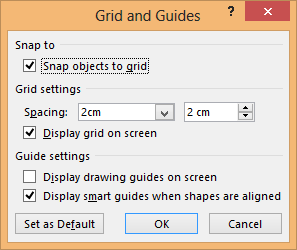
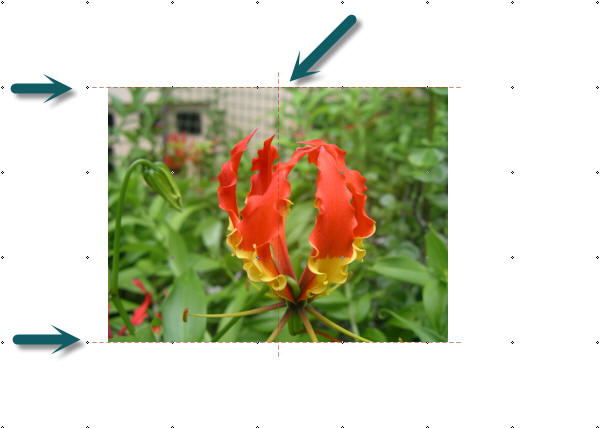
I first of all set my Snap to Grid at 2 centimetres (yours will
probably be in inches), and I check the "Snap objects to grid" option.
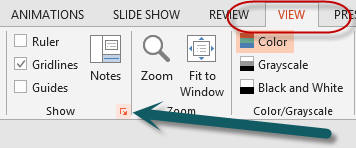
The easiest way to display the gridlines dialogue box is to click the little
down arrow in the Show group on the View tab of the Ribbon.
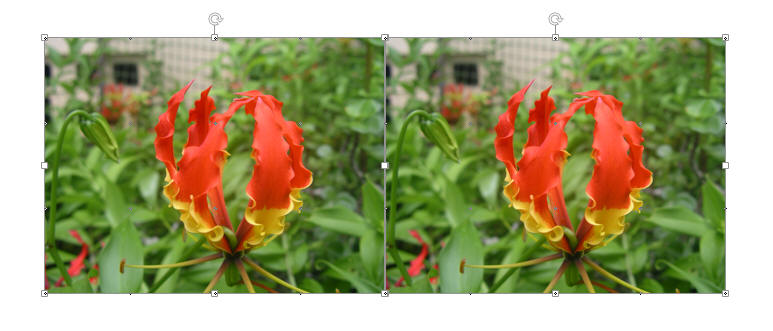
I then insert two identical images on my slide, which I
want to split in half.
Note that I drag the image handles, after they
are inserted, so they will snap to the existing grid.
Now to the cropping. Notice, that with the Snap to Grid
option checked, my cropping of the left image will also Snap to Grid.
This image is cropped to the first snap.
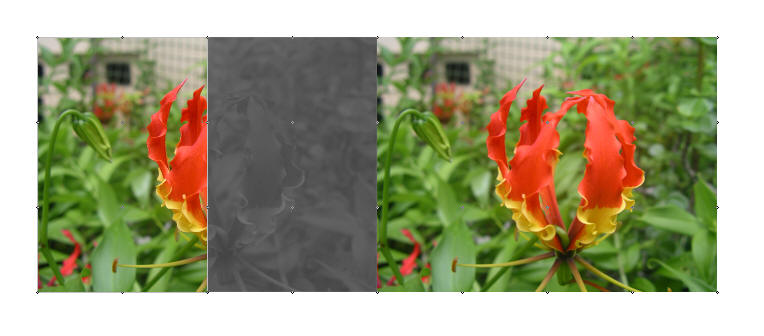
This is the second...

So far, so good. But, as I said, I want to overlay both
images and split them in the middle, but match edges perfectly so no-one
can see the join.
Because the images were placed exactly on the grid in the grid was used for
cropping, they should align perfectly.
As I drag the image at the right to the Guide marks (or dots) at the centre,
notice the Smart Guides coloured red which pop up at the top and bottom of my
selections.

When I turn off snap objects to grid, I can then position my images exactly
where I want them.
Now we can use some clever animation to make the single image animate from
different directions.
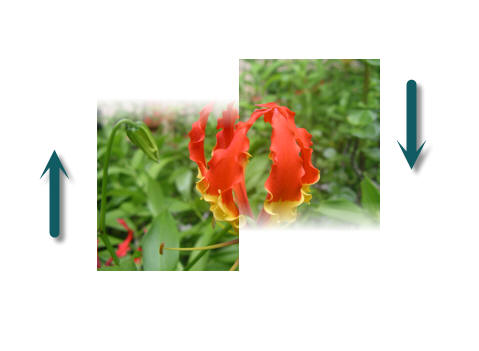
Try it. It really works!
|
