|
Hidden Pivots
Logic: make an animation in PowerPoint move along a different
rotation point
While you can use Motion Paths to direct where and how objects move in a
slideshow, you can take advantage of hidden pivot points for greater precision.
I needed to get images to fly in, join another image which was already rotating,
move around it in unison, and then fly off.
Note this example is one of the
downloadable animation
examples.
The steps are quite simple:
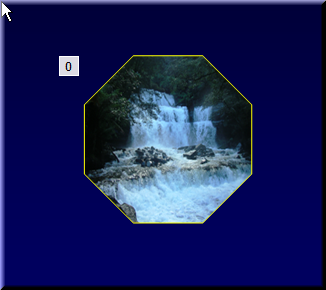
First, we insert a hexagon and set it with a Spin Emphasis, rotating
anticlockwise at 16 seconds. This is to give it enough time to spin with all of
the images flying in. The reason I used an autoshape with an image set as its
background is I want to reuse the autoshape to get it on top of the image in
exactly the same location.
I then duplicate the autoshape and set its fill to nothing. I
shifted the image so you can see it.
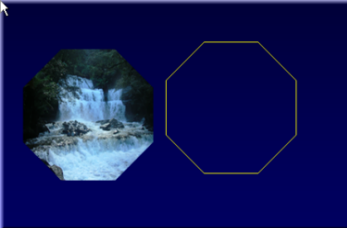
This autoshape will eventually be totally hidden, and will be
joined to another autoshape to provide a pivot point.
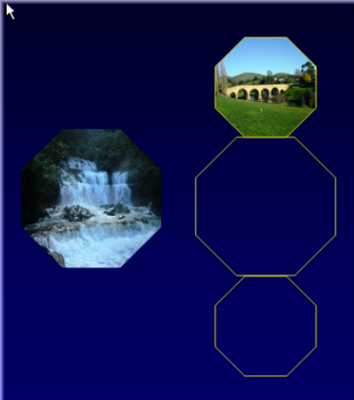
Here, you can see the autoshape added to another one above it
and below it, and then all three grouped together. The autoshape at the top has
an image as background, and the bottom two are made invisible (no fill or line).
The last task is to animate the grouped object in by Fly in from Right, Spin
Emphasis once, then Fly Out to Left. The hidden objects allow the whole shape to
rotate at a different centre than would be normally achieved.
Another use is to get, for example, a clock pendulum to swing.
as usual, examples of this technique that you build are welcomed by me.
Here are a few other things to remember.
-
Accuracy. Grouping two objects as
I have done with the octagons means you can get an exact pivot point
because of the size of the shape of the object you are adding to your
original shape. In the above example, using the same
shape and size of octagon results in exact
placement of objects and pivot points.
-
Reusing objects. If you use an autoshape
in your pivot, you can replace the background image. The
above example was built with one shape (built from 3
grouped autoshapes), and then reused. That is, I
built the sequence once, duplicated it, replaced the
background image and had a new sequence.
-
Reusing animations. This is by the same
process. By being able to change the background fill of
one of a number of grouped shapes, say, a picture, you
can reuse the group and its animations.
Now for an update.
There is another way to do this, as listed
here by my mate John. It is
quick and easy, and works very well if you have a single
object that you are pivoting. One thing you may grapple with
is accuracy. That is, dragging the crop handle to the exact
length you need to make the pivot point be in an exact
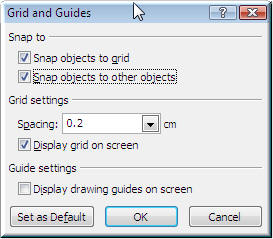
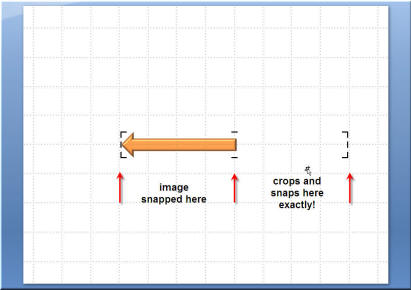
location. While this method is not totally accurate, you can get better
precision by turning on Snap to Grid and tweaking the
measurement amount before you commence. That will make the crop point "Snap" to
precise increments. If your original pivot object is
"snapped" to the grid, you will get a good dragged crop to
the same length.
|
