|
Twist and Morph!
Logic: create a powerful animation within PowerPoint's that can
be customized simply by changing the background image
This
PowerPoint animation is simply amazing. Since I demonstrated it at PowerPoint Live,
it is taking off across the world! So, I think it is time to make it fully
public!
It takes advantage of old
PowerPoint technology (masking) and new technology (newer
animations).
What we will do is:
- Place an image as a background to a slide,
- cover it with an Autoshape that will be the slide background people will
actually see,
- Place Autoshapes over that false background,
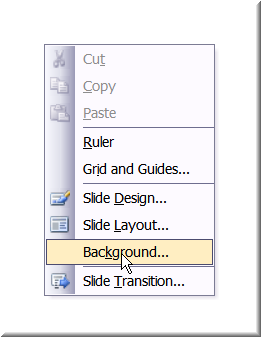
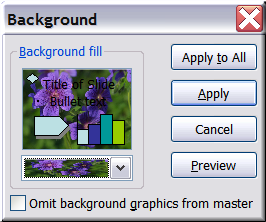
- Set the Autoshape backgrounds to "Background".
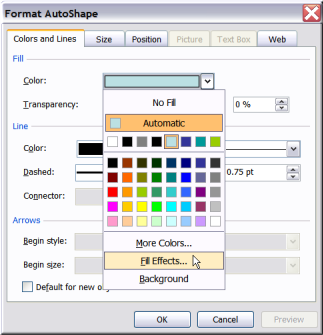
By the way, if you need help on filling objects with some sort of fill,
go here.
Echo has a tutorial where she covers that without me going into all of it. It is
for Color Schemes.
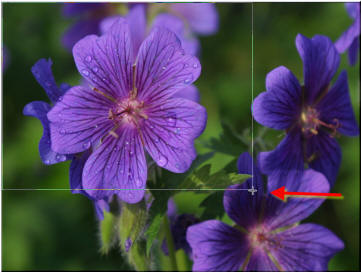
First, we place an image as the slide background. Try to get one that fits
your slide proportions, or it will deform to fit and look silly.
We then drag a rectangle autoshape over the whole slide, to cover the
background. This will fool everyone into thinking there is no background,
because they wont be able to see it.
We format the autoshape into and style or colour we like. But
try to get it to look like a normal side background.
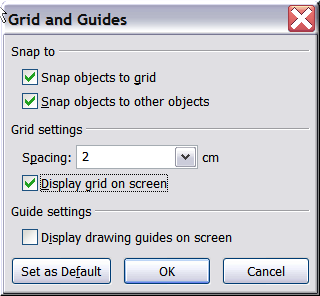
Now, do yourself a favour and set the grid snapping to something
like 2 centimetres or an inch. This will help you draw the next level of
Autoshapes.
Now, I have drawn a new layer of autoshapes. I've tried very
hard to get them to sit beside each other exactly.
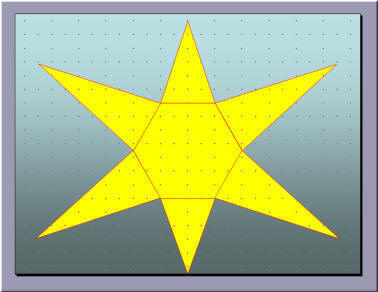
Now the cool part. We set each yellow filled autoshape to have
its fill as "Background". This is a setting from a long time ago that allowed
people to mask objects. In PowerPoint 2002 and 2003, it picks up the slide
background through ANY other object on the slide. Notice as you bump them around
on the slide, they update to whatever is behind them on the slide.
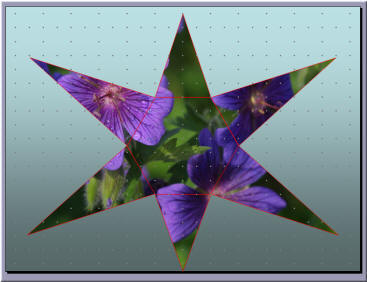
This is where you need to be sitting down.
If you animate any of the autoshapes that have a fill set to
"Background", it will pull the background with it as it moves. If you didn't
have the false background there, it would look silly. A shape animating off
itself.
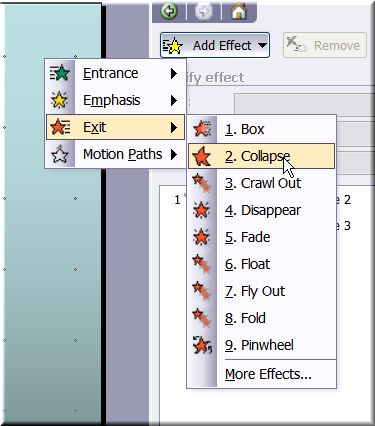
I animate Exit Animations as "Collapse".
|
